
No Fear Zippers
Hey team! The All Well Weekender and the Half Moon Zip are coming SOON (Tuesday, September 24th!), and we are so excited to get them out in the world! Lots of people have told us that they’ve never sewn a zipper before and the thought makes them a little nervous (super normal!!!), so we thought we’d give you all our favorite tips and tricks to make your first (or hundredth!) zipper FEARLESS!


It’s important to be familiar with the names of the parts of a zipper because patterns often refer to the parts by name in zipper-sewing instructions. The names may vary a little bit, but once you know the gist of it you should be able to figure it out!

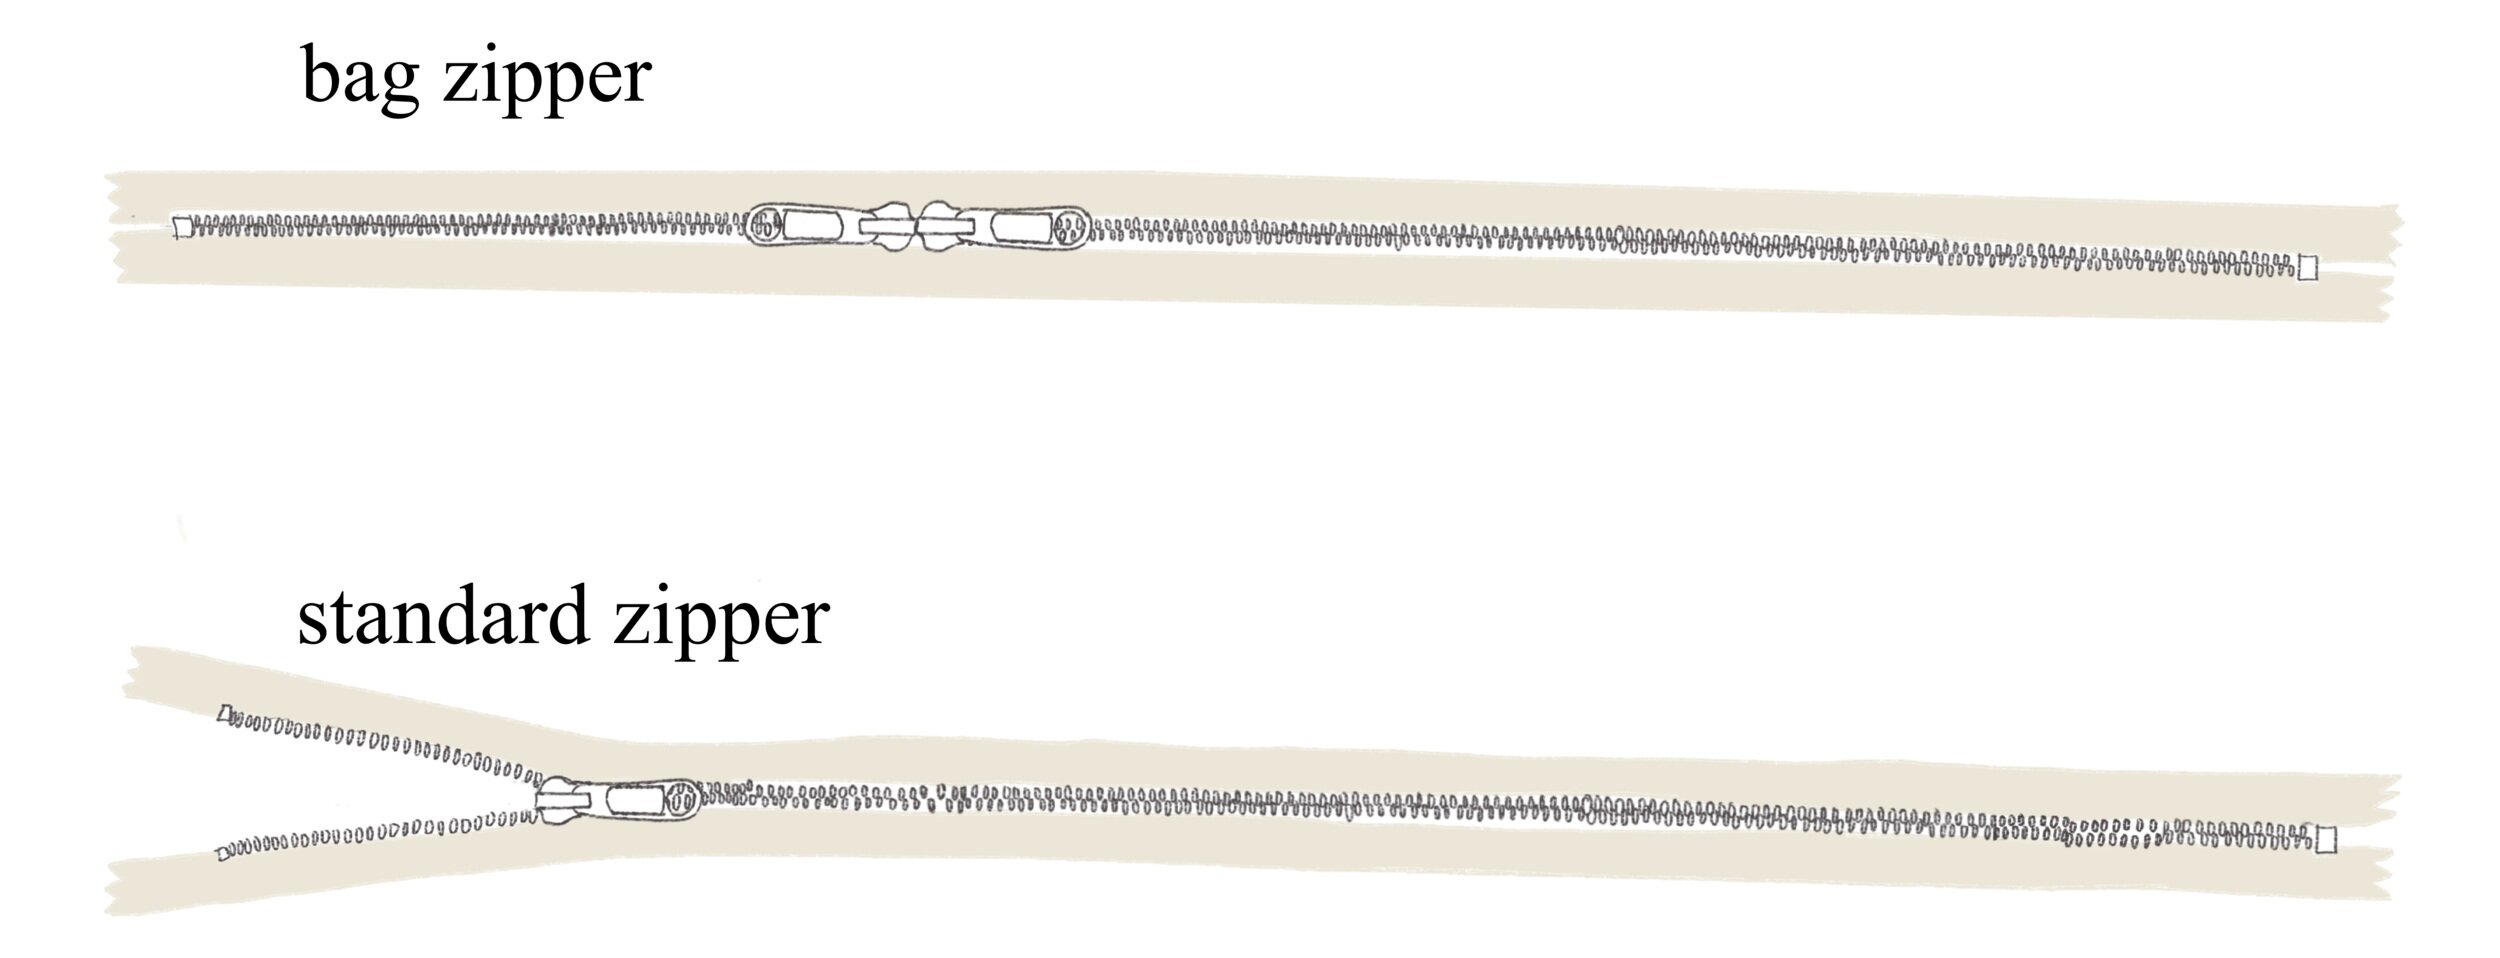
There are LOTS of different kinds of zippers. There are separating zippers and non-separating zippers. There are zippers that are open at the top (standard zippers) and zippers with end-stops on both ends (bag zippers). Choosing the right kind of zipper can really help your project be successful. It will be much harder to figure out how to use your zipper if you have a separating zipper and you really need a non-separating zipper, and vice versa.
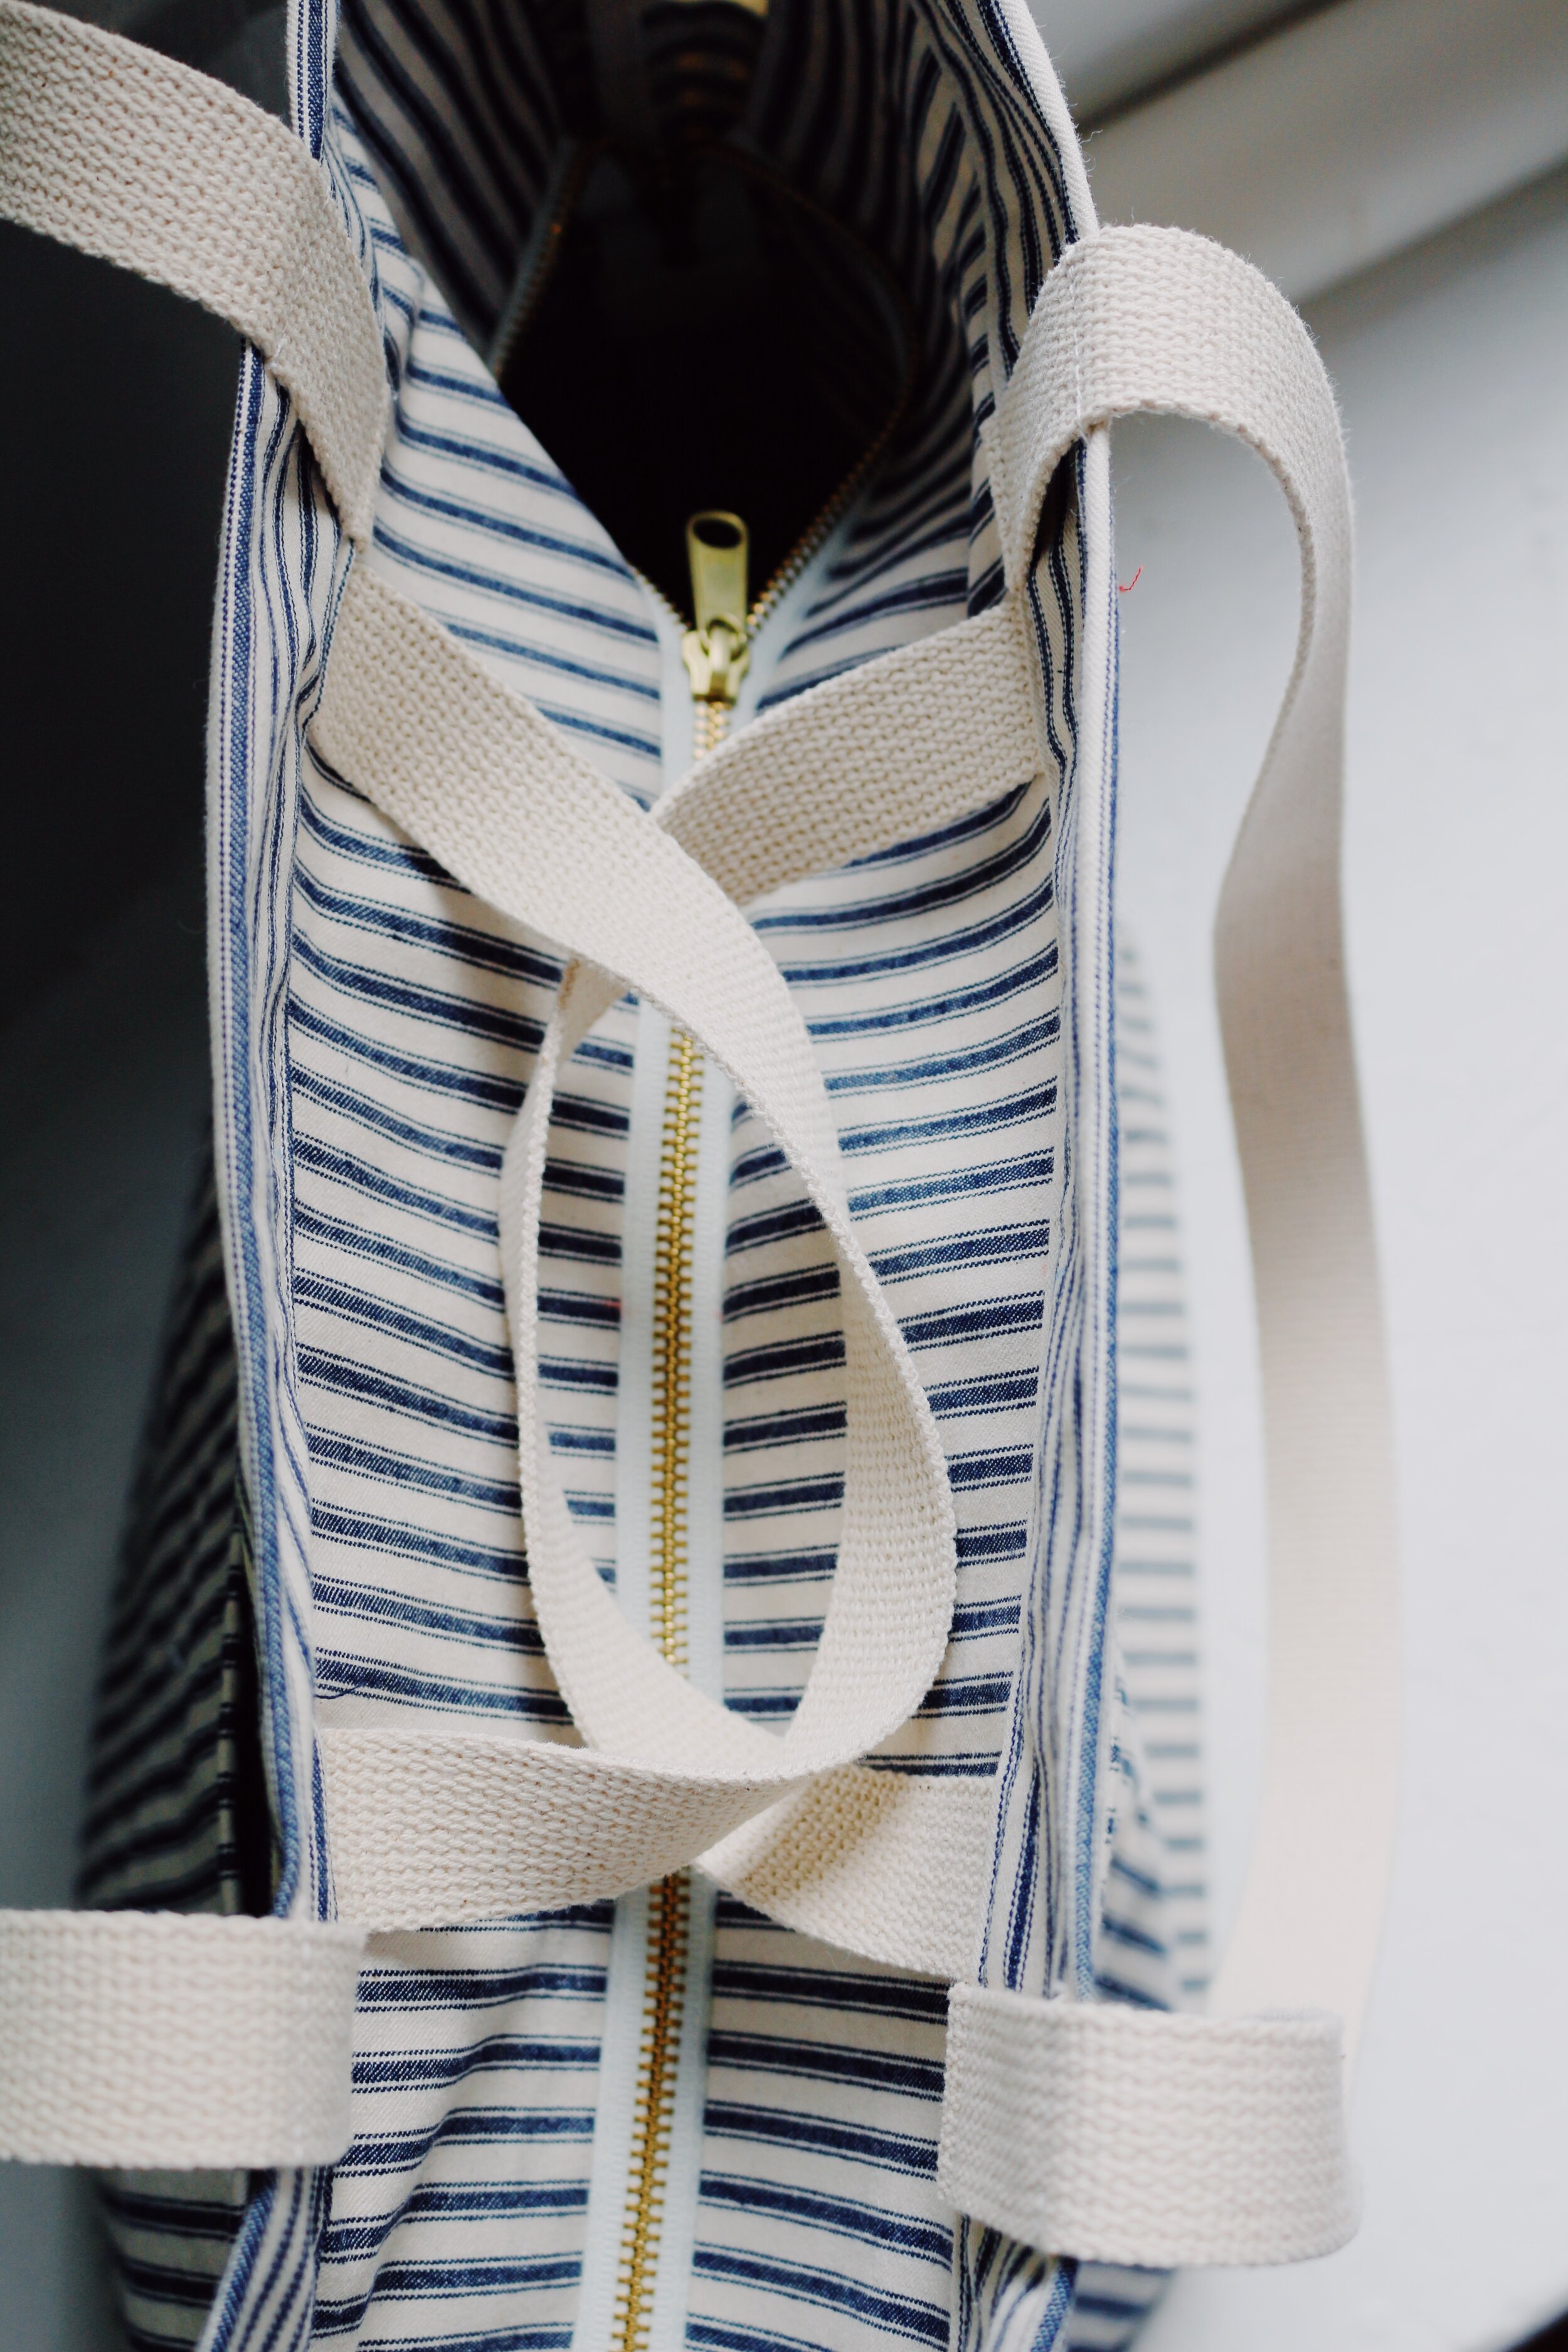
For the All Well Weekender, the best zipper to use is a Bag Zipper, or a zipper like the top one pictured above, non-separating, where both sides are closed and the pulls meet in the middle. See the parts of a Bag Zipper below. (These zippers are sometimes also called “Backpack Zippers” — the important things is the two pulls and the closed ends)
For the All Well Weekender, the ideal length of the Bag Zipper is 24” — though longer and slightly shorter zippers will also work (and you can fairly easily shorten a bag zipper if needed). Try not to go any shorter than 22”!
Your local shop may only have Standard Zippers (non-separating), and they will also work great for the All Well Weekender, just with slightly different sewing instructions! (We’ll fill you in when you’re making the bag). 22” is the ideal length for a Standard Zipper for the All Well Weekender.

For the Half Moon Zip, you’ll be looking for a Standard Zipper — non-separating, open on one end and closed on the other, with only one pull. See some Standard zippers (and the lengths you’ll need!) below. You’re looking for an 8” zipper for the clutch version, and a 5” zipper for the coin purse.


I’ll be honest, shopping for zippers can be really tricky! You might have to search for a little while to find exactly what you want. Traditional stores may not have a great selection, especially when there are so many different options, lengths, and colors available.
I’ve had pretty good luck with two etsy shops in particular: Zipit, and Zipper Island.
You can also buy zippers from Wawak and Zipperstop.
A few important things to note about choosing a zipper:
The length of a zipper that is notated in patterns and on zipper packaging or internet listings it is the length of the zipper teeth, not the zipper tape. The tape will extend approx. 3/4” on either side of the stops at the end.
Zipper teeth come in different sizes. The size is indicated with a # symbol. For medium to heavy-weight fabrics, #5 and up is best! You want a zipper that will be large and strong enough to hold up to the fabric it's sewn to.
It’s totally possible to make a zipper shorter, especially if your zipper isn’t made of metal! Here’s a tutorial for shortening both metal and non-metal zippers.
With zippers, going with a brand name can often pay off. Generic zippers sometimes lack in quality. We’ve had great experiences with YKK zippers, they’re the best in the biz from what we can see!
Here’s a few direct links to zippers I’ve used for the All Well Weekender before and liked:
22” bag zipper.
30” bag zipper (a little long but can be shortened!)
24” nylon zipper
22” standard metal zipper
Here are zippers I’ve used for the Half Moon Zip and liked:

Sewing a zipper is easier than it looks, but it’s definitely intimidating the first few times. It’s super normal to be nervous! Here are a few of our favorite tips and tricks from sewing zippers lots of times. We’re starting to get a little less nervous about it.

Using a zipper foot can really help! You sewing machine may have come with a zipper foot, or something that essentially looks like half of your normal sewing machine foot. This helps you get your needle right up against the zipper so that you can sew your zipper with the correct seam allowance. Depending on the width of your normal foot, you may be able to fudge it without, or it might be an absolutely necessary tool for you to have a successful time sewing zippers. Feel it out.
Often, you’ll need to sew across the zipper. This may seem ill-advised or even impossible, especially with metal zippers, but it’s actually super possible! When sewing across the zipper, nylon zippers and plastic zippers sew very easily — just use the handwheel and go slowly and you’ll be fine. Be aware, though, that sewing across a nylon or plastic zipper will almost always damage that part of the zipper, so there’s no going back! It makes a great alternative zipperstop though. To sew across a metal zipper, definitely exclusively use the hand wheel — no foot pedal here! Go super slowy with the handwheel, and when you bring the needle down toward where the teeth are, wiggle the zipper until your needle finds its way between the teeth. You can’t sew through the metal so you have to sew around it! Luckily, metal zippers are harder to damage!
Remember that you can pin zipper tape! Pins are your friends!
It really helps to move the zipper pull around as you sew. The zipper pull is wider than the teeth, so if you leave it in place and sew beside it it will skew the zipper tape a little bit and mess up your seam allowance. To move the zipper pull while sewing, simply plant your needle down, lift the presser foot, and open or close the zipper a little bit to push it back behind your presser foot (toward the part you’ve already sewn). Then lower your presser foot again and keep sewing! If the way you are sewing the zipper allows you to get the pull totally out of the way before sewing, do that! Even easier!
Make sure to always topstitch the zipper on both sides after you’ve sewn it — this creates a polished look and helps keep the zipper tape and seam allowance out of the way of the teeth. Without this step the zipper may work well at first, but a fraying raw edge of the fabric beneath may soon get in the way.
Always align your zipper with it fully zipped up — then decide whether you’d like to sew it open or closed, one will probably emerge as seeming easier. It’s important to do with aligning with it closed though. You can run into major problems if your project is fine-tuned and your zipper teeth end up misaligned. Then it won’t zip at all!
YAY! Now you’re ready to sew zips fearlessly and with ease! Try it out with the Half Moon Zip or the All Well Weekender, and if you run into problems you can always contact us or google it! So many youtube videos and blog posts out there that will show you exactly what you need to see. xoxo!